Design Team member Jaclyn Rench is featuring our April Main Kit today with step by step instructions for creating a handmade stitched element for your scrapbook pages!
Here's Jaclyn...
If you follow the trends in scrapbooking, you know that hand stitching is back in style in a big way! While the results are fun and offer a homemade touch to your project, it can be quite time consuming to commit to this technique. So, today I'll show you a fun way to add an embroidered element to you page that makes a statement but doesn't require a big investment of time.
Here's a look at the embroidered heart I worked into the design of one of my April Main kit pages...

Framing out the heart with one of the Simple Stories chipboard frames gives it more presence on the page, and keeps it from getting lost amongst the other elements.
To start you'll need:
a scrap of cardstock. (Here I've trimmed mine to fit neatly behind the dimensions of the chipboard frame.)
a punched shape to trace (you can also freehand your design if you wish!)
a pencil
embroidery thread
a small needle
paper piecer
Begin by laying out your design. If you're using a frame, as I did, you'll want to lay that atop your scrap cardstock for proper placement. Then lay your punched piece in the center.

Now, using your pencil, trace lightly around the punched heart, creating a stitching guide.

The next step is to poke the holes in your paper. You can do this with a paper piercer, or the actual needle you will use for your stitching. My stitching runs vertically through the heart. With that in mind, start at the upper left portion of the design and poke a hole. Following that placement, you'll want to poke a coordinating hole directly below that one, along the traced design. Here's an example of that - where holes 'A' and 'A' coordinate, 'B' and 'B' coordinate, and so on. Complete piercing the holes throughout the remainder of the design.

Now, it's time to stitch! A good way to secure your stitching to the back of your project is with a bit of washi tape.

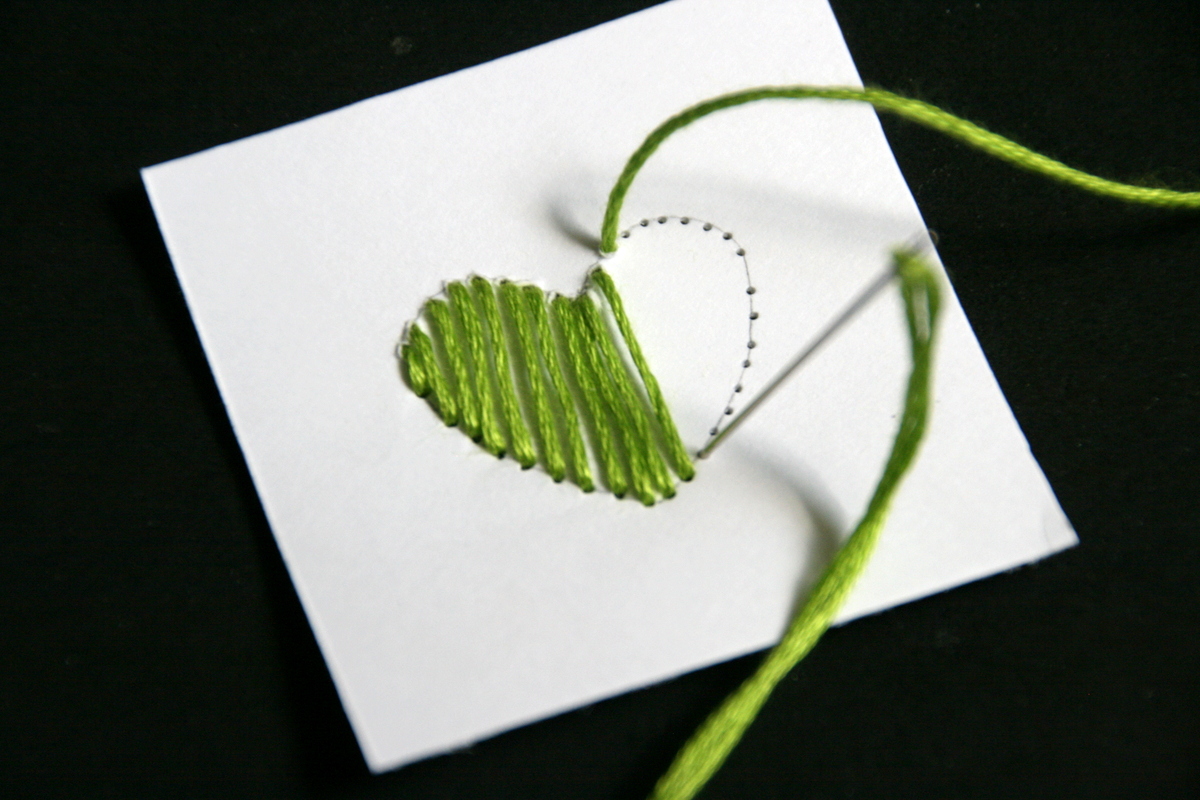
Continue your stitching, up and down the design, matching up the coordinating holes, until it's complete.

Here's a look at the full page in which I incorporate this fun technique...

Now you have a fun handmade element to add to your page! I hope you'll give this technique a try and share the result with us!
Please visit our Design Team gallery to view more of Jaclyn's inspiring work.
Here are our April Kits (click to enlarge):

For full descriptions of our kits, subscription information, and more, visit our website at MyCreativeScrapbook.com
No comments:
Post a Comment